
SFTP Documentation
Overview
This document assumes prior knowledge of SFTP. You can learn more about it here.
You can interact with your data in ThankView via SFTP (a secure file transfer protocol) which allows you to transfer and access data through a secure system.
Setup
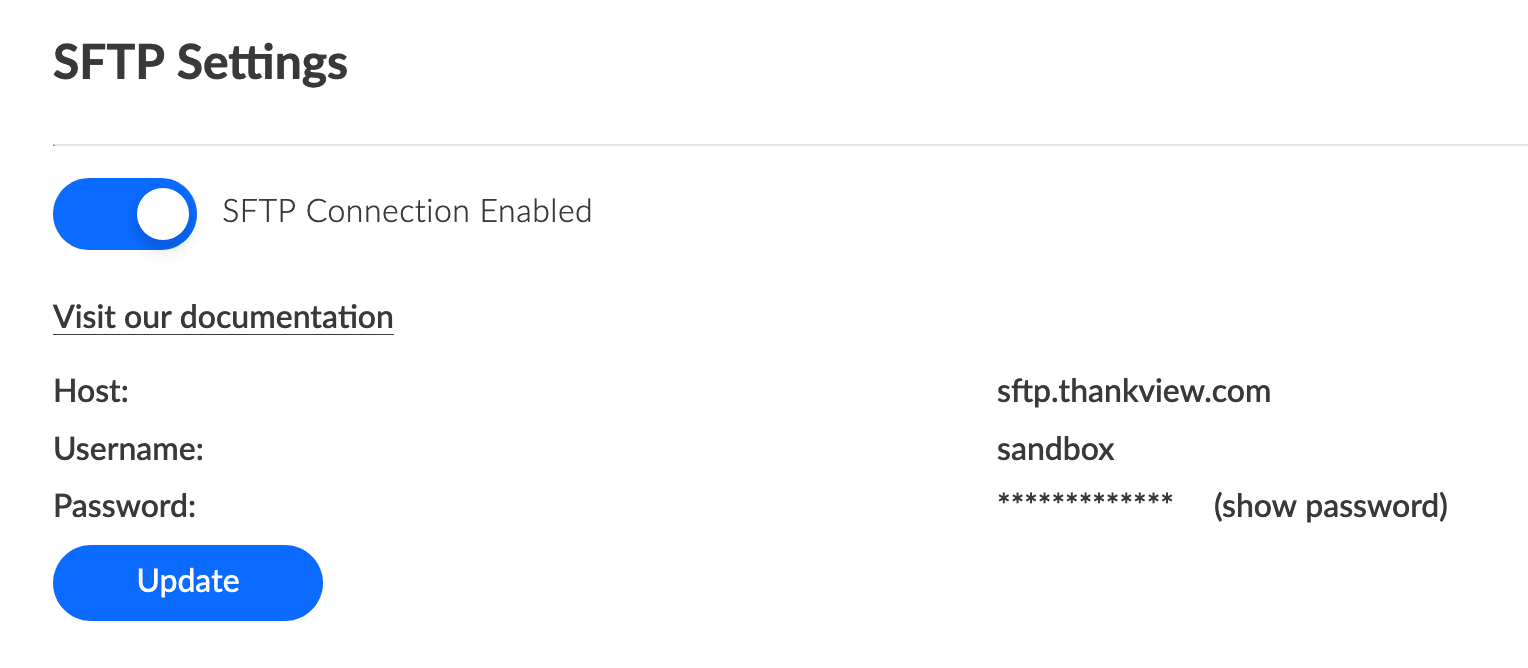
Activate SFTP integration:
- Login to your ThankView portal and click on “Settings” under the account menu in the upper right hand corner of your screen.
- On the left sidebar, choose Integrations & APIs, and enable the SFTP connection.
- The host, username, and password will be shown to you after enabling.
Accessing SFTP:
- Use the host and login credentials from your settings page to access your SFTP.
- You should see a similar directory structure when you’ve successfully logged in.

Campaigns
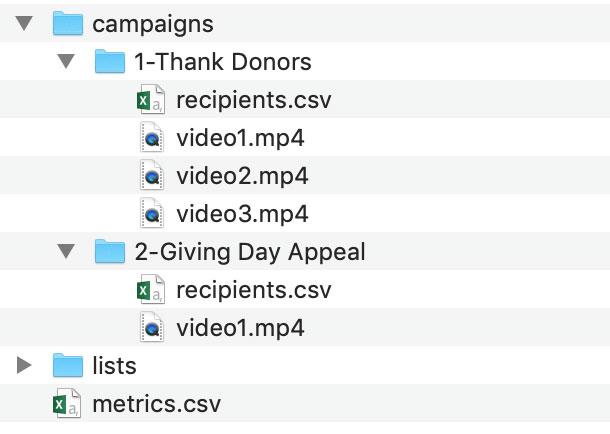
Directory Structure:
- At the top level, there is a directory, campaigns.
- Inside the campaigns directory there will be subdirectories for every campaign you have in ThankView. The name of the subdirectory follows this convention: [campaign id] - [campaign name]. This is auto-generated for you based on existing campaigns.
- Within each campaign directory, there is a “recipients.csv” file that is auto-created for you.

Importing Recipients:
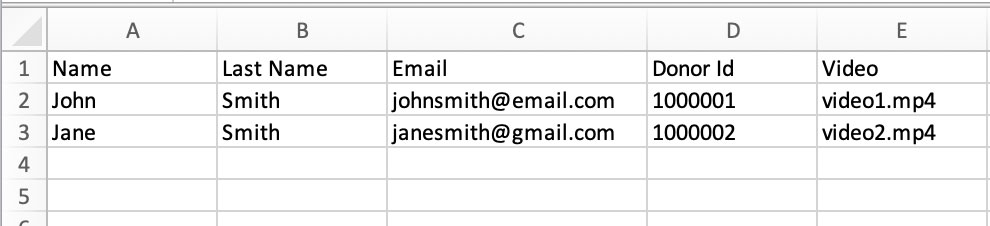
- Open a “recipients.csv” file and add new recipients (it is important to keep the headers the same so our system knows how to correctly import the fields into ThankView).
- You will be notified when the recipients have been imported into your campaign.
Attaching Videos:
- Upload videos into the same directory as your “recipients.csv”. The videos must have the file extension: .mp4, .mov, .avi, .mpg, .mpeg, or .webm.
- In your "recipients.csv" file, add a column, "Video", and specify the name of the video in the campaign each recipient should be attached to.
- You will be notified when a video is uploaded to your campaign and informed about the number of recipients attached to it.
Scheduling ThankViews:
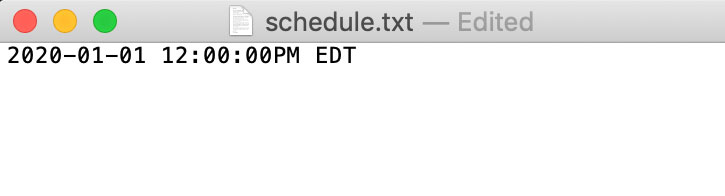
- Create a text file, "schedule.txt", and set a future date and time on the first line of the file. ISO 86001 format is preferred but other formats will work as well. e.g.
- 2020-01-31T17:00:00-04:00
- 2020-01-31 17:00:00 EDT
- 31-Jan-20 17:00:00 EDT
- 31 Jan 2020 17:00:00 EDT
- You can also send the videos immediately by setting the text "now" in the "schedule.txt" file.
- Upload the text file into the same directory as your “recipients.csv”.
- You will be notified when the ThankViews in a campaign have been scheduled.
- If the date is not properly formatted or the date has passed, you will be notified of the error.
Lists
Directory Structure:
- At the top level, there is a directory, lists.
- Inside the lists directory, there will be a file that corresponds to each of your lists in ThankView with the naming convention: [list id] - [list name].csv.

Create A New List:
- Upload a new CSV file in the lists directory with your recipients.
- The name of the file will be used as the name of the list in ThankView.
- You will be notified when the list has been imported into ThankView.
Update an Existing List:
- Open a CSV file in the lists directory and add new recipients (it is important to keep the headers the same so our system knows how to correctly import the fields into ThankView).
- You will be notified when the recipients have been imported into your list.
Metrics
Download Metrics:
- At the top level, find a file, metrics.csv.
- Download the file to view detailed metrics for your existing ThankView sends.
- This file gets updated everyday at 5AM EST.